Banana Bread
A banana bread built around overripe fruit. Kit, prep, method, notes, and a running log of every bake.
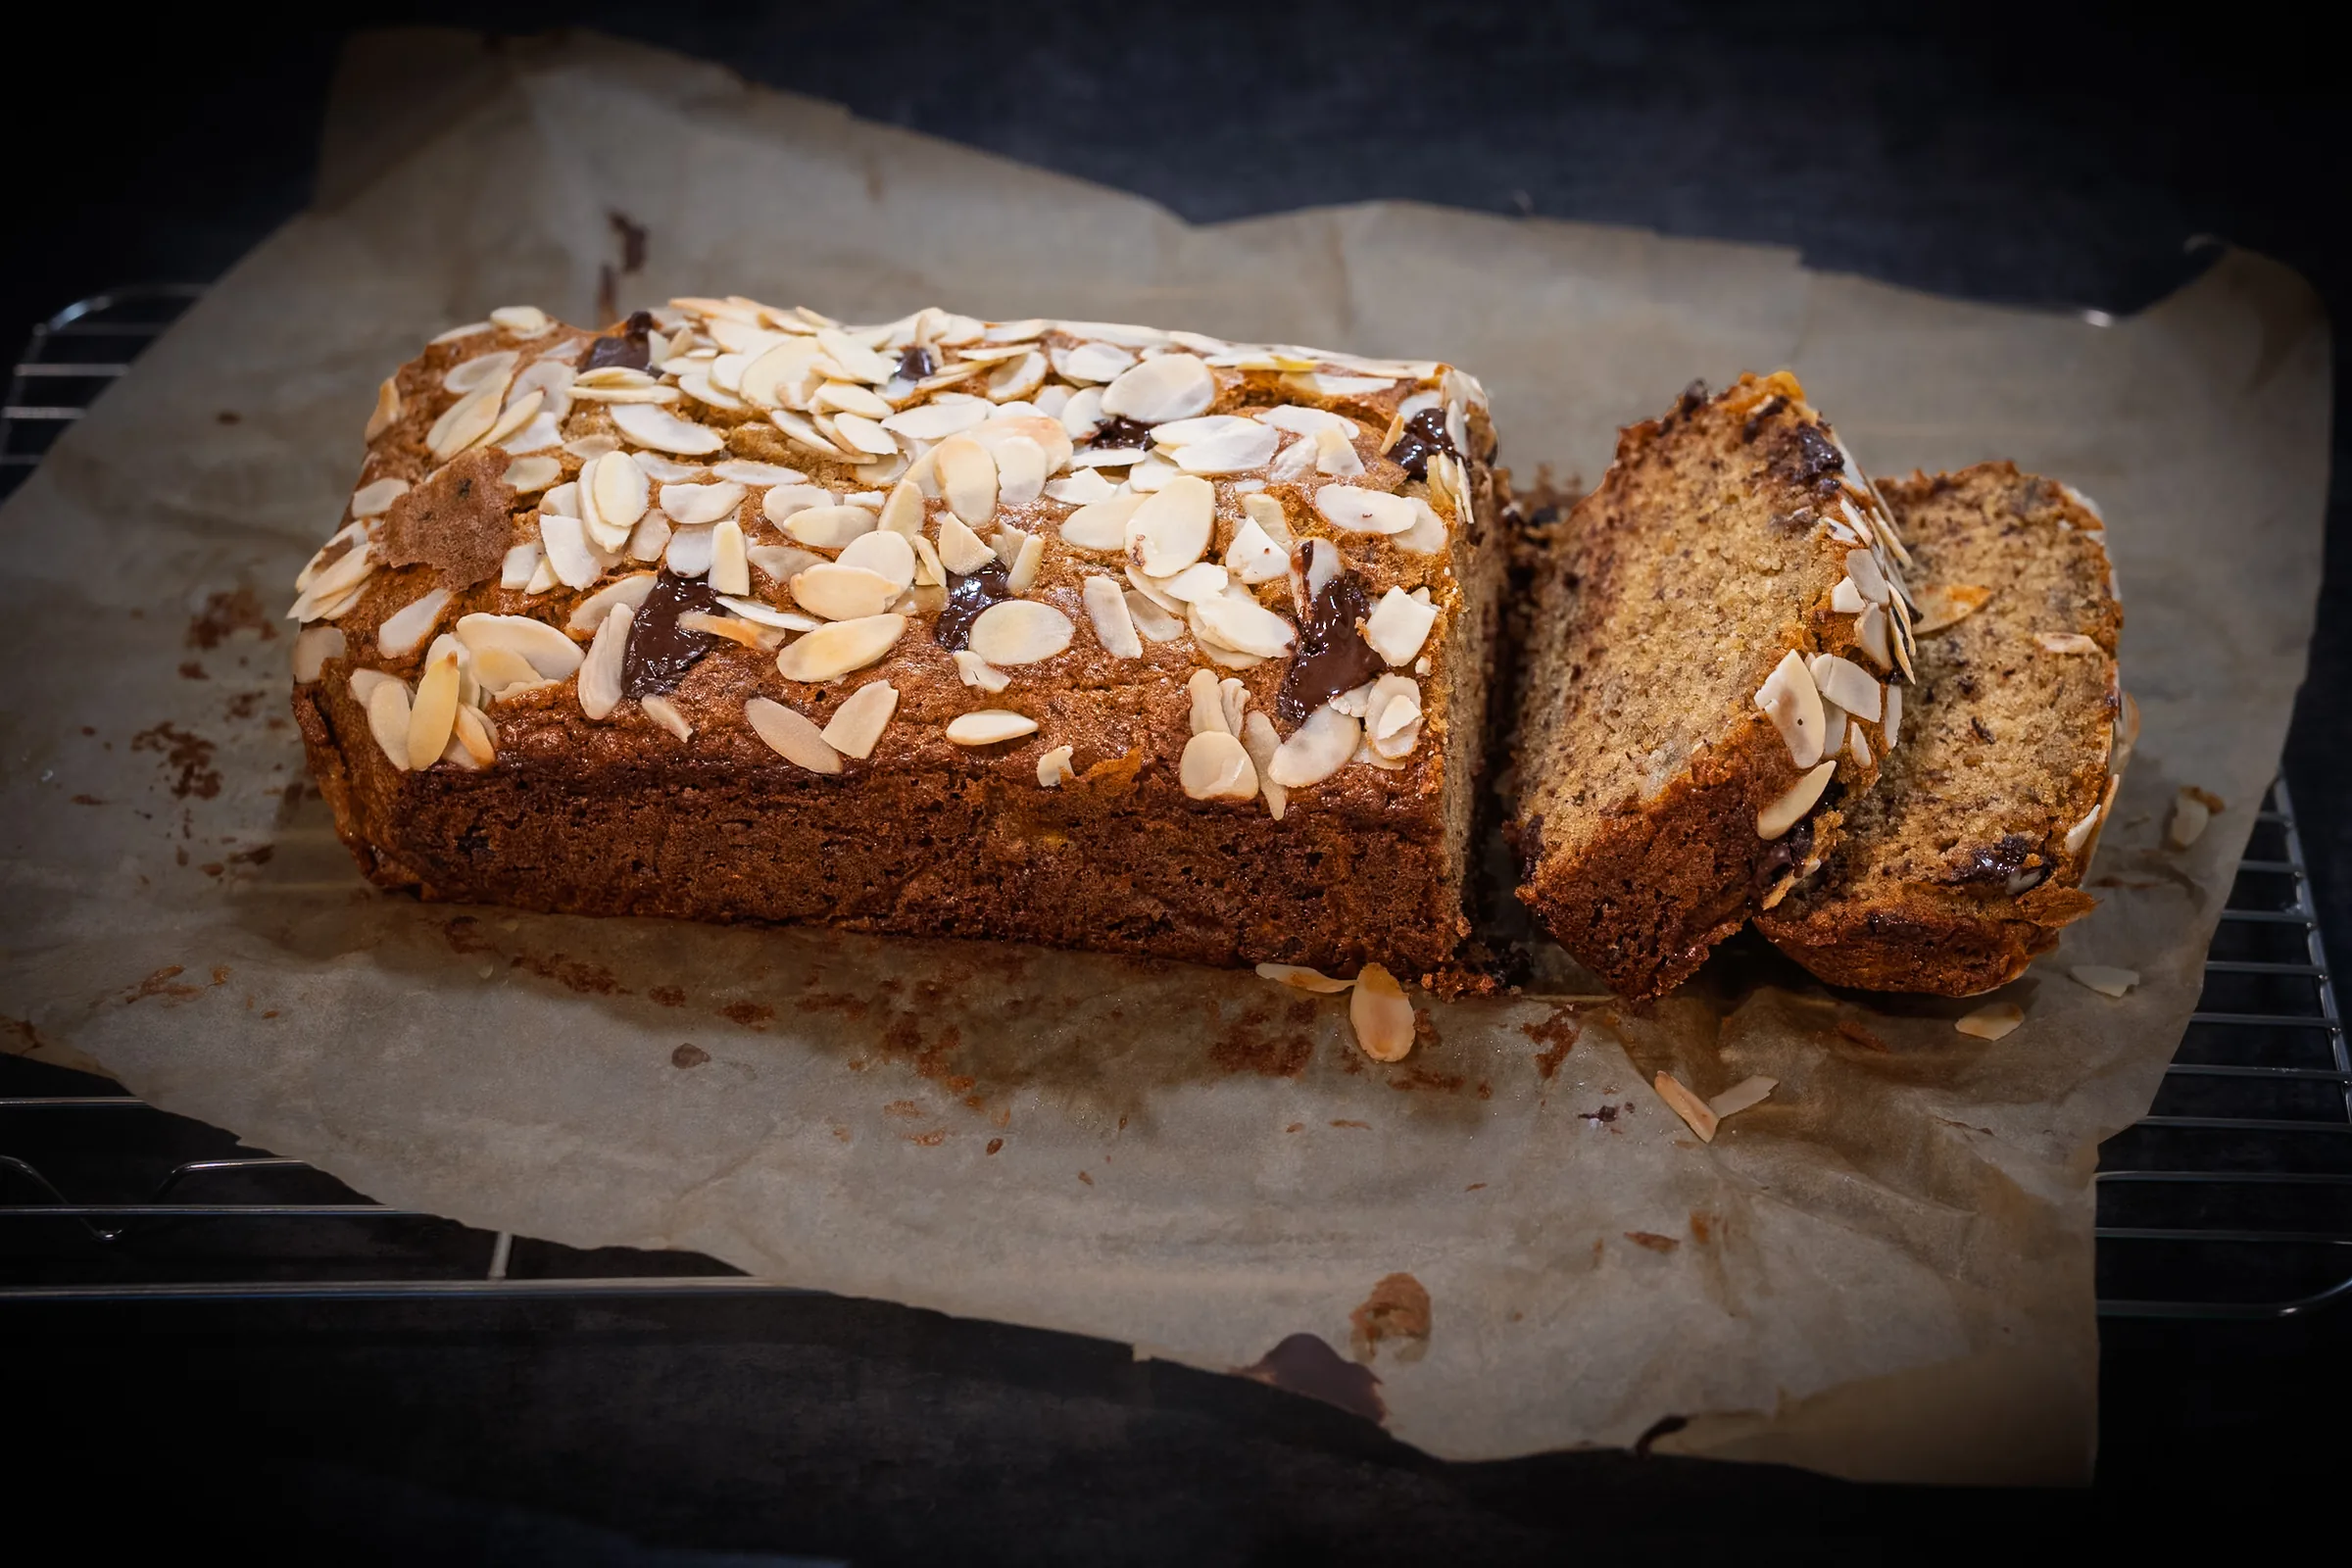
This is the fourth thing I have ever baked. The first three were a potato bun, a Finnish blueberry pie, and a Swedish kladdkaka.
Banana bread kept turning up in front of me for weeks, so I bought bananas and left them on the counter until the skins went black. It also covers something the other two did not. The pie forgave everything and the kladdkaka punished a long bake, so both of them ran on the oven. This one runs on the fruit. Ripe bananas give you a sweet, wet loaf, and underripe ones give you a bready one at the same oven setting.
Two bakes in, it has changed how I look at everyone else’s. I cannot go into a shop now without analysing their loaf and dissecting it. Theirs come out shinier than mine, as though the top has been brushed with something, and I like that. They also tend to run a split banana along the top rather than almonds, and I prefer that look. The third bake goes that way.
The post is split so the method carries instructions and nothing else. Every reason sits in The Notes, keyed to the step it belongs to, and every bake gets logged in The Bakes with the same columns each time.
Why Banana Bread
Banana bread uses fruit that has gone too far to eat. As a banana ripens the starch converts to sugar and the flesh softens, so the fruit sweetens the loaf and keeps it wet without more sugar or butter doing that job.
flowchart TD
    A[Mash bananas, leave lumps] --> F[Stir banana into the wet bowl]
    B[Whisk flour, bicarb, baking powder, salt] --> G[Fold dry into wet, stop early]
    C[Cream butter and muscovado] --> D[Beat in eggs, vanilla, yoghurt]
    D --> F
    F --> G
    G --> H[Chocolate in, into lined 2lb tin]
    H --> I{Bake 45 to 55 min at 160C fan}
    I -->|Probe reads 94C| J[Out of the oven]
    I -->|Probe reads under 92C| K[5 more minutes, fresh spot]
    K --> I
    J --> L[15 min in the tin, then wire rack]
    L --> M[Cool 1 hour before slicing]
The Kit
I bought a Silverwood 2lb Loaf Pan with Rounded Corners, MPN 40712.
I would not have guessed I would ever spend £30 on a tin to bake in, and here we are.
| Detail | Value |
|---|---|
| Material | Anodised aluminium, uncoated |
| Capacity | 2lb (900g), British Standard size |
| External size | 10.75 x 5.5 x 3in |
| Made in | Birmingham, England |
| Total cost | £35.64 delivered |
The rounded corners version releases a wet cake batter more cleanly than the Vpan, which tapers and suits a crusty tin loaf instead.
Anodised aluminium has no non-stick coating on it, so there is nothing to peel or blister, and the tin will not warp or rust. The light silver surface also browns slower than a dark coated tin, which is what this recipe needs over an hour in the oven. The trade-off is that a bare tin sticks more for the first few bakes and builds a patina as it goes. The patina is a colour change and not a coating, so the tin gets greased and lined every single time.
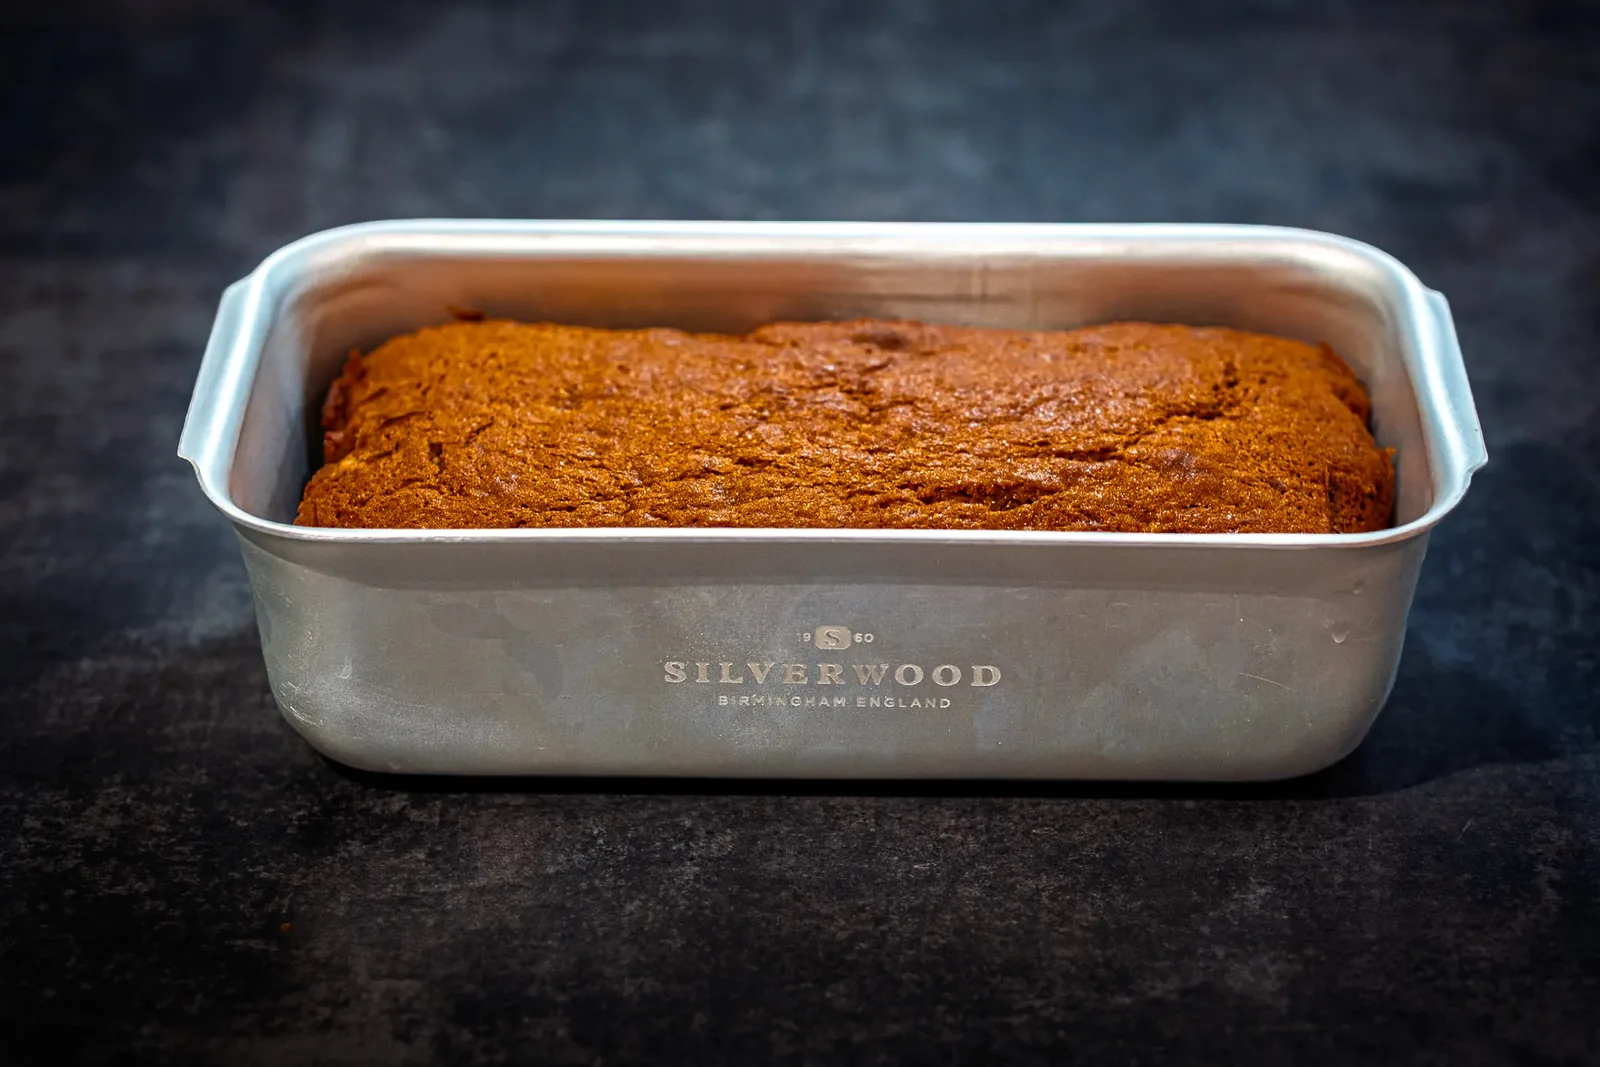 The plain loaf sits in the 2lb Silverwood tin, which has rounded corners and a bare anodised surface that browns slower than a dark coated tin.
The other thing this recipe needs is a probe thermometer. Two bakes ran long because a skewer cannot tell you how far past done a loaf is, and chocolate in the crumb stops the skewer working at all.
Preparing an uncoated tin
Wash it in warm soapy water and dry it fully before the first use. Hand wash only, no dishwasher, and dry it straight away rather than leaving it on the rack.
The Ingredients
Yields 10 slices.
| Ingredient | Brand / Source | Amount |
|---|---|---|
| Overripe bananas, peeled | Any, three medium | 300g |
| Plain flour | Waitrose Organic | 250g |
| Bicarbonate of soda | Any | 1 tsp (~5g) |
| Baking powder | Any | ½ tsp (~2g) |
| Salt, fine | Any | ½ tsp |
| Unsalted butter, softened | Yeo Valley or Kerrygold | 115g |
| Light muscovado sugar | Billington’s | 150g |
| Large eggs | Notting Hill Farmers Market | 2 |
| Greek yoghurt, full fat | Yeo Valley | 60g |
| Vanilla extract | Nielsen-Massey | 2 tsp |
Add-ins
| Ingredient | Brand / Source | Amount |
|---|---|---|
| Dark chocolate, 50%, chopped | Menier or Green & Black’s | 100g |
| Flaked almonds | Waitrose | 25g |
Both went in on the second bake and both stay in.
Banana Ripeness
How far gone the bananas are changes the loaf more than anything else in the method.
| Skin | Result |
|---|---|
| Yellow with green tips | Starchy and barely sweet, bready loaf |
| Even yellow | Mild flavour, needs more added sugar to carry it |
| Yellow with brown freckles | Usable, decent sweetness |
| Mostly brown or black, soft inside | The correct one, sweetest and strongest flavour |
A black skin is fine. Flesh that smells fermented or has gone grey is not, so throw those out.
Ripening bananas in an hour
If the bananas are still yellow, put them unpeeled on a lined tray and bake at 150°C fan for 15 to 20 minutes until the skins go black and shiny. Cool them completely, then peel and mash. The skins split and leak, so line the tray properly.
Substitutions
Plain flour, not self-raising. The bicarbonate of soda and baking powder here are measured against the acid in the bananas and the yoghurt, and self-raising adds more leavening on top of that.
Soured cream, crème fraîche, plain natural yoghurt or buttermilk all stand in for the Greek yoghurt at the same weight. Natural or plain, never flavoured, since vanilla or fruit yoghurt adds sugar the recipe has not accounted for.
Fine salt, not flakes. It goes into the dry bowl and has to spread through the whole loaf, and a coarse flake sits in the batter as a crystal and gives you a salty patch in one slice and nothing in the next.
Chocolate at 50%. 70% went in on the second bake and read bitter against the fruit.
The Prep
Everything below happens before the first two bowls meet. Once the dry bowl hits the wet bowl the bicarbonate of soda is already reacting, and stopping to weigh flour at that point costs you lift.
- Butter out. 115g on the counter for an hour. It should dent when pressed and hold its shape.
- Oven on. 160°C fan, or 180°C conventional.
- Flour split. Weigh 250g, take 8g out into a small bowl, 242g into the dry bowl.
- Chocolate chopped. Snap the bar along its score lines into squares. Stack three or four squares on a board and cut straight down through the stack twice, so each becomes three or four rough pieces. Five squares stay whole for the top. The rest goes into the 8g of flour and gets tossed until dusted.
- Tin greased. About 10g of butter, taken off the block separately from the 115g. Rubbed over the base, up all four sides and into the corners with a folded square of kitchen paper until the inside looks slightly wet. Fridge-cold butter is fine.
- Tin lined. One strip of baking paper, about 30cm by 12cm, along the base and up the two long sides, a few centimetres overhanging each edge. Short ends stay bare and greased.
- Everything else weighed into bowls.
Softening butter in a hurry
Cut the 115g into 1cm cubes and spread them on a plate, and they are ready in 15 to 20 minutes. Grating the block on the coarse side of a box grater straight from the fridge gets there in about 5. For a hands off version, fill a bowl with boiling water, tip it out after two minutes, dry it and put it upside down over the cubes. Never the microwave, because butter goes from solid to melted in a couple of seconds and melted butter will not cream.
The Method
Step 1, Mash the bananas
300g peeled banana into a bowl. Fork it down, lumps left in. Set aside.
Step 2, The dry bowl
242g plain flour, 1 tsp bicarbonate of soda, ½ tsp baking powder, ½ tsp salt into a second bowl. Balloon whisk, 30 seconds, lifting as you go rather than dragging it round in a circle. Stop at one even colour with no white specks. No sugar in here.
Step 3, Cream the butter and sugar
115g softened butter and 150g light muscovado into the biggest bowl. Electric whisk on low for 10 seconds, then medium for two minutes. Scrape the sides and the bottom curve down twice. Stop when it holds a soft peak on the lifted whisk.
By hand with a wooden spoon, four to five minutes.
Step 4, Eggs, vanilla, yoghurt
Whisk on medium. First egg, 20 to 30 seconds, scrape down. Second egg, 20 to 30 seconds. Then 2 tsp vanilla and 60g yoghurt, 10 to 15 seconds on low.
Whisk into the sink.
Step 5, Banana in
Mashed banana into the wet bowl, stirred through with a spatula. Spatula only from here.
Step 6, Fold in the dry
Whole dry bowl into the wet bowl at once. Down through the centre, along the base towards you, up the near side, over the top, quarter turn of the bowl. That is one fold.
Ten to fifteen folds. Stop the moment no dry flour shows, checking the bottom curve of the bowl before calling it done. The batter looks thick, rough and streaky.
Step 7, Fill the tin
Floured chocolate in, loose flour and all. Five or six folds.
Into the tin, levelled with the back of a spoon. Five reserved squares pressed in half sunk, spaced along the length. 25g flaked almonds scattered in one layer, pressed down with your palm.
Step 8, Bake
Middle shelf. One firm tap of the tin on the counter first.
45 to 55 minutes at 160°C fan.
Door check at 30 minutes, looking at the almonds. Dark brown means foil laid loosely across the rim, not tucked under the tin.
First probe at 40 minutes, into the deepest part of the centre. Out at 94°C. Under 92°C means 5 more minutes and a retest in a fresh spot.
Step 9, Rest
15 minutes in the tin, on a rack. Then out by the two paper overhangs, paper peeled down off the long sides, base paper left underneath.
One hour on the rack, uncovered, before slicing.
How to Tell If It Came Out Right
The probe goes into the middle of the loaf, at the deepest point.
| Probe reads | What to do |
|---|---|
| Under 92°C | 5 more minutes, retest in a fresh spot |
| 93°C to 96°C | Out, this is done |
| 97°C and above | Out now, it has gone past and the crumb comes out dry |
Without a thermometer the skewer still works on a plain loaf. It stops being reliable once there is chocolate in the crumb.
| Skewer comes out with | What to do |
|---|---|
| A few moist crumbs | Out, this is done |
| Wet batter coating it | 5 more minutes and retest |
| Completely dry and clean | Out now, any longer dries it |
| Clean at the edge, wet in the middle | Foil over the top, 5 more minutes |
| Coated in one spot, crumbs in another | A chocolate seam, not raw batter, so take the drier reading |
A finished loaf has a domed top with a split running along the middle, a dark brown crust, and sides that pull away from the paper. The split is correct. It happens because the crust sets before the centre finishes rising.
A tunnel through the middle means overmixing. A wet line along the base means it needed longer. An even crumb with small holes means it came out right.
Slice it with a long serrated bread knife rather than a chef’s knife. A straight blade compresses the crumb and a serrated one saws through the crust cleanly. Cut the end off first, then 2cm slices with a long back and forth stroke and no downward pressure, wiping the blade if the banana sticks to it.
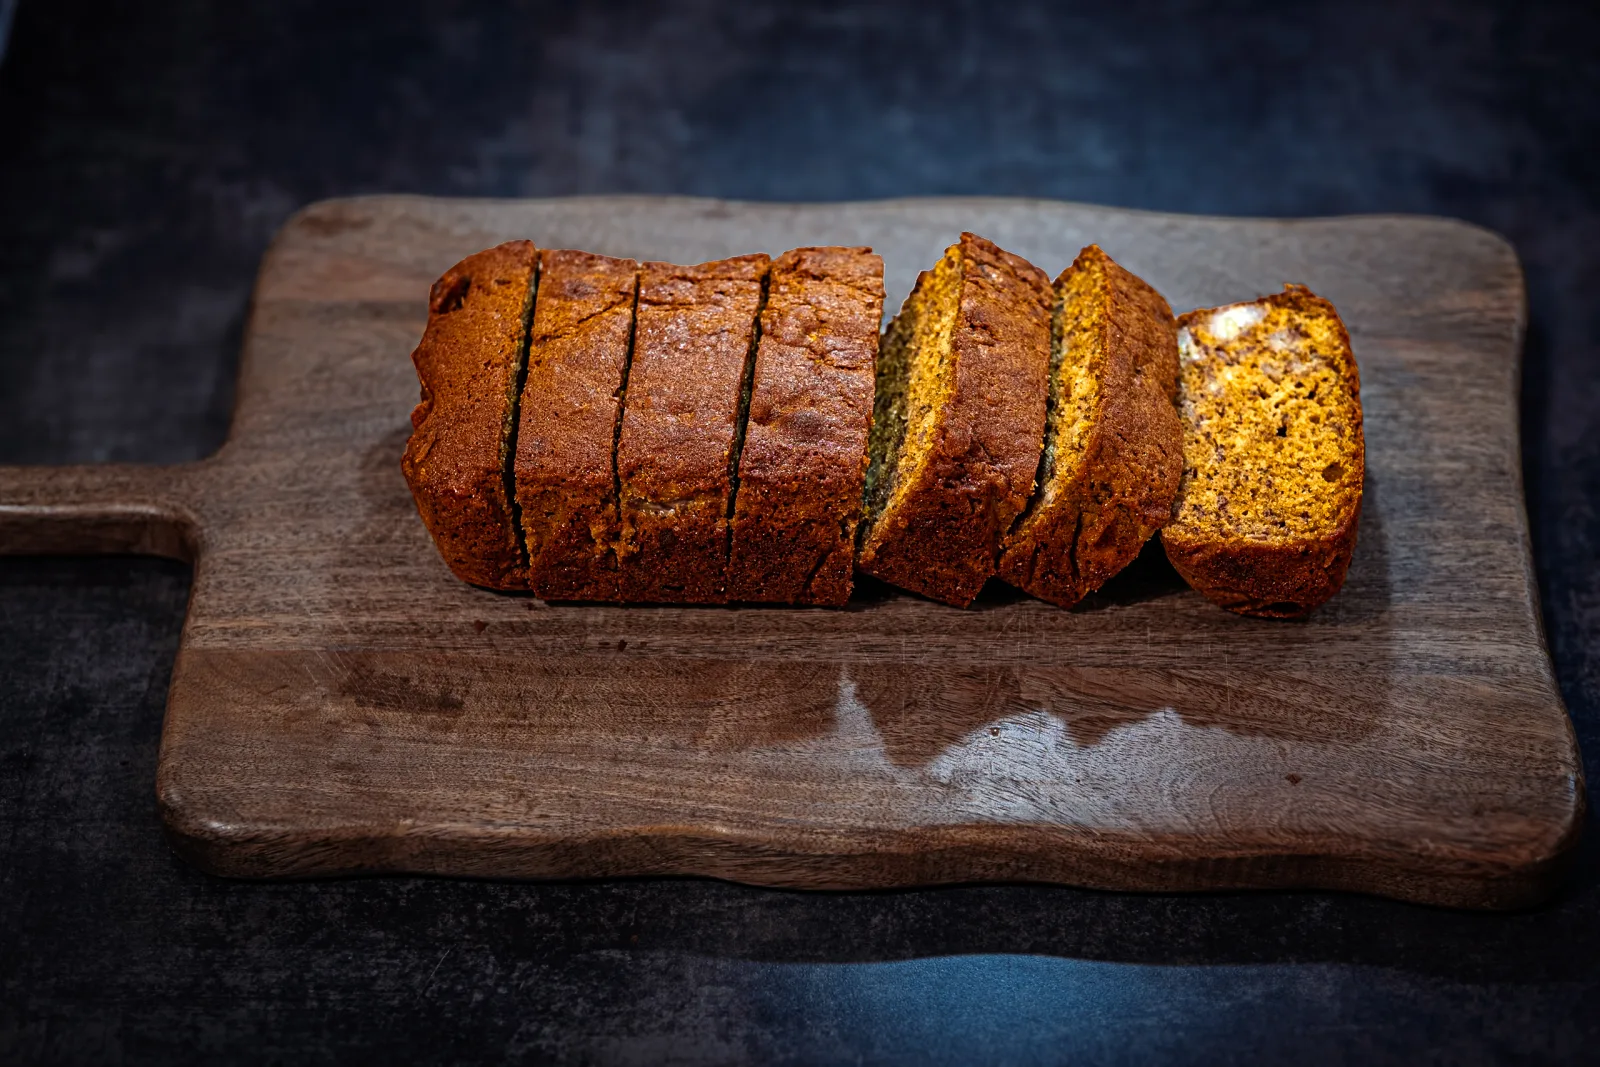 The loaf cut into 2cm slices with a serrated knife, showing the split along the top and the crumb underneath.
Storage
| Method | Time |
|---|---|
| Airtight tin, room temperature | 3 days |
| Fridge, wrapped | 5 days, drier crumb |
| Freezer, sliced and wrapped individually | 3 months |
Cool the loaf completely before it goes into anything sealed, which takes about three hours rather than the hour it needs to be sliceable. Warm bread traps its own steam, the steam condenses on the lid and drips back onto the crust, and the top goes tacky overnight.
Keep it whole rather than slicing it up. Every cut face is a surface losing moisture, so a fully sliced loaf dries out several times faster than one with two exposed ends. Stand the loaf cut face down on a plate inside the container and the exposed crumb sits against a flat surface instead of the air.
The freezer is the opposite. Slice the whole loaf, wrap each slice individually, and freeze. Nothing dries out at that temperature and you take out one slice rather than thawing the lot. A slice thaws at room temperature in about half an hour, or goes into the pan from frozen at a lower heat for three minutes a side.
Skip the fridge. Cold speeds up the staling reaction in the starch, so a refrigerated loaf goes dry faster than one sitting on the counter.
Toasting a Slice
Day two banana bread toasts better than a fresh slice does. The cut face has dried slightly, so it browns instead of steaming, and the sugar from the muscovado and the banana caramelises straight on the surface. Fresh out of the oven the face is too wet for any of that to happen.
A dry frying pan with butter is the method. Cast iron holds its heat, so the slice does not drop the pan temperature when it goes in, and the face browns evenly. Stainless works at a lower setting with more watching, because it has hot spots over the burner and browns the butter faster.
- Heat the pan on medium for three or four minutes.
- Add about 10g of butter and wait for it to stop foaming.
- Slice in cut face down, pressed flat with the spatula for a second so the whole face makes contact.
- Check the colour at 60 seconds. Deep brown across the face means flip it.
- Give the second side about a minute, since the pan is hotter by then.
Eat it straight off the pan. It softens again within a few minutes of sitting on a plate.
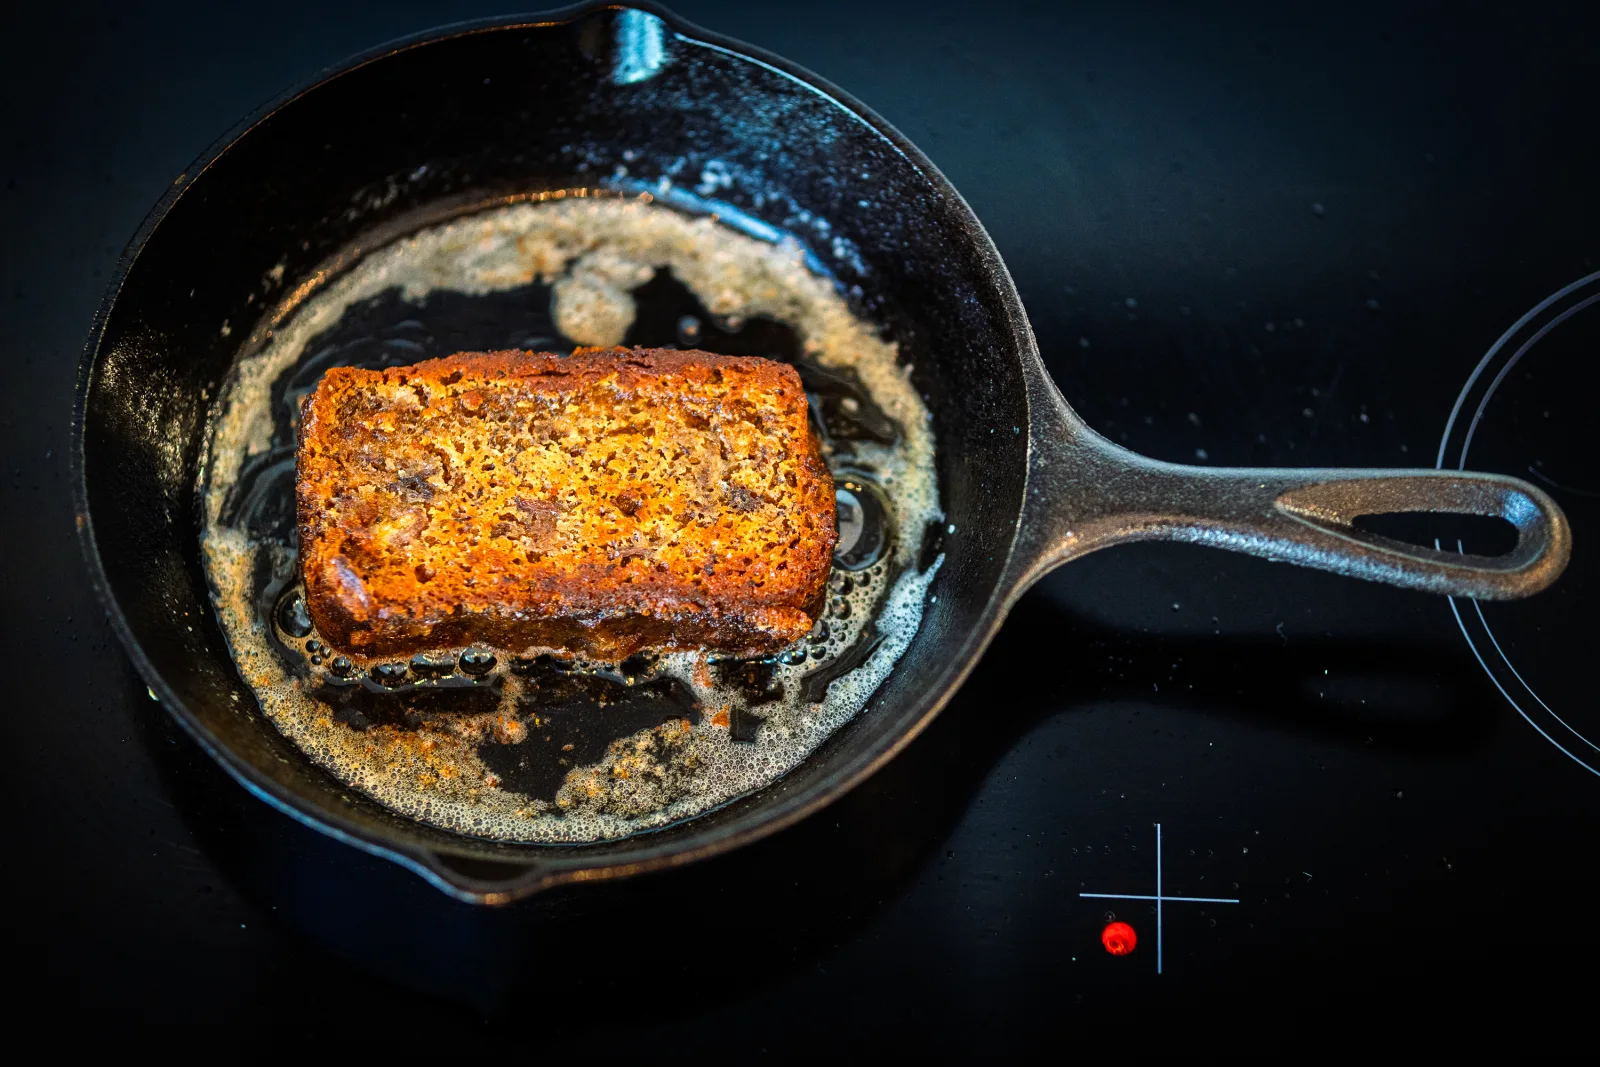 The caramelised face comes up out of the foaming butter after a minute in the cast iron pan.
The pan runs hotter than you think
Cast iron keeps enough heat to finish a slice with the burner off. Two minutes a side is the outer limit, not the target, and a domed cut face burns at the high point while the rest stays pale. First attempt here came out black in patches at two minutes.
A closing toastie grill does not work for this. The plates compress the crumb rather than crisping it, and melted sugar runs into the ridges.
Salted butter, cream cheese, Greek yoghurt with honey, or peanut butter all go on top. Warm with vanilla ice cream turns it into a pudding.
Nutrition, Per Slice (10 slices, no add-ins)
| Macro | Amount |
|---|---|
| Calories | ~285 kcal |
| Protein | ~4.5g |
| Carbohydrates | ~41g |
| Fat | ~11g |
| Fibre | ~1.5g |
| Sugar | ~19g |
With Add-ins
| Add-in | Additional kcal per slice | Additional fat |
|---|---|---|
| 100g dark chocolate across the loaf | ~55 kcal | ~3.5g |
| 25g flaked almonds across the top | ~15 kcal | ~1.3g |
| 10g butter on a warm slice | ~74 kcal | ~8g |
Per slice this runs lighter than the pie at ~350 kcal and the kladdkaka at ~360 kcal, mostly because the bananas replace butter and sugar rather than adding to them.
The Notes
Why the steps are what they are. Nothing here tells you to do anything, so the method above is the only place an instruction lives.
What Each Part Does
| Element | Role |
|---|---|
| Overripe bananas | Sugar, moisture, and most of the flavour |
| Bicarbonate of soda | Reacts with the acid in the bananas and yoghurt for lift |
| Light muscovado sugar | Molasses content deepens the flavour and holds water |
| Greek yoghurt | Adds acid and fat, keeps the crumb soft |
| Long, low bake | Cooks a deep loaf through without burning the crust |
| Full cooling | Sets the crumb and stops the centre going gummy |
Step 1, why lumps stay in
A fully smooth purée spreads evenly and gives one flat note of banana through the whole loaf. Lumps survive the bake as soft pockets of fruit, which is where the flavour concentrates.
300g is peeled weight, so you need about 450 to 500g of whole fruit to get there.
Step 2, why the whisk lifts
Bicarbonate of soda clumps, and a clump that survives into the batter leaves a soapy patch in the finished loaf. Dragging a spoon round the bowl moves the clumps rather than breaking them.
The 150g of muscovado stays out of this bowl. It goes in with the butter, because the sugar crystals cutting into the fat is what makes the air pockets.
Step 3, judging the cream
Muscovado does not go pale the way white sugar does, so the call is on texture and volume rather than colour. The mixture goes lighter, fluffier and noticeably bigger.
Butter that stays in lumps is still too cold and needs another 10 minutes. Butter that looks greasy and separated has gone too warm, so the bowl goes in the fridge for 10 minutes and the step starts again.
Step 4, one egg at a time
The fat only takes on so much liquid at once, and both eggs together tends to split it.
The mixture may look curdled or grainy after the yoghurt, which happens when the eggs are colder than the butter. The flour brings it back together.
Step 6, do not overmix
Every extra fold develops gluten. Banana bread batter that has been beaten smooth bakes tough and rubbery with tunnels through the crumb. A slightly rough batter is correct.
Dry flour hides in the bottom curve of the bowl, which is why that gets checked before the folds stop.
Step 7, pieces not chips
Chips hold their shape. Chopped pieces melt into seams through the crumb, so a slice pulls apart with chocolate running through it instead of sitting in it as separate lumps.
The 8g of flour is what stops them sinking to the base. Dusted pieces grip the batter.
The almonds are a surface job and do nothing to the crumb. Flaked rather than whole or chopped, they toast in the oven heat and give a crisp shell against a soft loaf. 25g covers a 2lb tin. 50g looks better going in and sheds off the board when you slice it.
Step 8, the two checks
Flaked almonds sit on the hottest surface of the loaf and brown well before the crust does, which is what the 30 minute door check is for. Pale at that point is normal, since the surface is still wet and the colour arrives in the last quarter of an hour.
A skewer through a melted chocolate seam comes out coated and reads as raw batter. A probe does not care what it passes through on the way, which is why the thermometer is the primary test and the skewer is the fallback.
Each probe goes into a fresh spot. The air sitting in the previous hole reads lower than the crumb around it.
Published times are for a tin, an oven and a batter that are not yours. Both bakes here finished before the recipe said they would.
Step 9, why 15 minutes and not 20
The tin holds heat and steam against the sides, and the crust there stays damp for as long as the loaf sits in it. It also keeps cooking for all 15 of those minutes.
Covering the loaf on the rack traps steam and the top goes tacky within 20 minutes. A hot loaf tears under the knife and the centre reads as raw while the steam is still in it.
The Bakes
3 September 2026, plain
| Detail | Result |
|---|---|
| Add-ins | None |
| In the oven | 20:12, 160°C fan, middle shelf |
| Colour at 40 minutes | Deep golden brown, no foil needed |
| First test | 55 minutes, skewer, came out clean |
| Out of the oven | 21:07 |
| Out of the tin | 21:22 |
| Sliced | 22:22 |
| Verdict | Ranks bottom of the three bakes so far |
Observations
The recipe is simple and that part holds up. Two bowls, a fold, an hour in the oven, and the method never gets difficult.
Out of the oven it was underwhelming. Fresh banana bread is soft and sweet and not much else, and against the kladdkaka and the blueberry pie it ranks bottom of the three.
Toasted the next day it was a different thing. Cut face down in the cast iron skillet with butter, the sugar caramelises on the face and you get a crisp shell against a soft middle. That version was better than fresh, and it is how the rest of the loaf got eaten.
The overripe fruit is the other cost. The bananas have to go black before they are any use, which is a wait of several days on the counter, and the fruit flies that came with them hung around the kitchen for days after the loaf was out of the oven. The oven ripening method removes the wait. It does not remove the flies if the fruit is already sitting out.
Second bake gets the chocolate in it.
9 September 2026, chocolate and almonds
| Detail | Result |
|---|---|
| Add-ins | 85g dark chocolate 70% through the crumb, 5 squares on top, 25g flaked almonds |
| In the oven | 17:43, 160°C fan, middle shelf |
| Colour at 30 minutes | Almonds still pale, no foil needed |
| First test | 48 minutes, probe, 98°C |
| Out of the oven | 18:34 |
| Out of the tin | 18:49 |
| Sliced | 19:49 |
| Verdict | Significantly better than the first |
Observations
The chocolate carries the loaf. Chopped pieces rather than chips melt into seams, so a slice pulls apart with chocolate running through the crumb instead of sitting in it as separate lumps. The 70% is too dark for it though. Banana is mild and sweet, and the bitterness cuts across the fruit rather than sitting under it. Third bake goes to 50%.
The almonds do one thing and do it properly. A thin crisp layer across the top against a soft crumb, which is the texture the plain loaf had none of. They were still pale at the 30 minute check and took all their colour in the last quarter of an hour.
The shorter bake is the real fix. 48 minutes instead of 55, and the loaf came out soft where the first one was dry. So the first bake was overcooked and the published time was wrong for this oven rather than the method being wrong.
The thermometer should have been in from the start. 98°C at 48 minutes, against a finish window of 93°C to 96°C for a quick bread, which means even the short bake overshot. That is the same pattern as the skewer coming out clean at 55 minutes on the first bake. Both times the loaf was finished before I checked, and the check was the thing at fault rather than the oven.
Third bake goes 50% chocolate, no almonds, a split banana across the top and part of the butter swapped for oil, out at 94°C.
What Changes for the Third Bake
The next three changes came out of drinking coffee rather than baking. Café banana bread reads moister and shinier than either loaf here, and a barista told me the trick is oil in the mixture.
He is half right. Butter is about 80% fat and most of the rest is water, while oil is 100% fat, so swapping some of the butter for oil puts more fat and less water into the same batter. The bigger gain is that oil stays liquid at room temperature where butter sets firm as it cools, which is why a butter loaf goes hard overnight and an oil one stays soft. A café bakes ahead and leaves the loaf in a display case all day, so keeping it soft on day two is the problem they are solving.
The trade is flavour and lift. Oil holds no air so it cannot be creamed, and Step 3 is where the air pockets come from. Going all oil would leave the bicarbonate of soda doing every bit of the work. So the third bake keeps 75g of butter for the creaming and swaps 40g for sunflower oil, stirred in with the eggs rather than beaten with the sugar.
Oil does nothing for the shine. That is a syrup brushed on while the loaf is still warm, either equal parts sugar and water boiled for a minute or honey let down with a little water. It seals the crust and slows the loaf drying out, which is the same reason the cafés reach for it.
The almonds come off. They did their job on the second bake and the crisp top was real, and I prefer the plain top I keep seeing behind the glass.
What goes on instead is a banana split lengthways and laid cut side up. That banana is not one of the black ones, since fruit that soft collapses into the batter and disappears. A just yellow one holds its shape, caramelises along the cut face and pulls the loaf open along its edges as it rises. One banana runs about 18cm against a 26.5cm tin, so covering the length takes two halves laid end to end.
Summary
| Detail | Value |
|---|---|
| Source | Standard method, built around overripe fruit |
| Adapted for | UK ingredients (Waitrose + Notting Hill Farmers Market) |
| Tin size | Silverwood 2lb (900g) anodised aluminium loaf pan |
| Bake time | 45 to 55 minutes at 160°C fan, out at 94°C |
| Yield | 10 slices |
| Calories per slice | ~285 kcal |
| Bakes logged | 2 |
| Best served with | Butter on a warm slice, or plain |
The method runs one bowl wet, one bowl dry, fold, chocolate, and three quarters of an hour in the oven. Most of the sugar and the flavour comes out of the bananas, so black skins do more here than technique.
The plain loaf was better toasted than fresh. Chocolate through the crumb and seven minutes less in the oven fixed that.
Documented September 2026.