Swedish Kladdkaka
A classic Swedish kladdkaka adapted for UK ingredients. Full method, nutrition breakdown, and how I ended up baking it.
This one has a story before the recipe. After I baked the Finnish blueberry pie in February, I asked my AI agent for similar recipes. The agent is my personal assistant with access to all my posts, training logs, and notes, so it knows what I have already cooked and what fits my taste. It suggested Swedish kladdkaka. I watched a few videos, liked how simple it looked, then ended up watching Why This Swedish Bakery Is a Local Favorite! on how a Swedish bakery opens in the morning and preps the cardamom buns. Sweden looked cool, so I booked a trip to Stockholm for end of May.
In the meantime I went to Waitrose and bought the ingredients, then sat on them for weeks because I did not want to eat the whole cake by myself. Today, 2 May 2026, I left Notting Hill Farmers Market with my usual 30 eggs, and other bits and bobs, and as I was carrying everything home I saw a group of girls notice my eggs. Thought they might be Swedish, asked where they were from, and yes they were 🇸🇪. Had a nice chat, and then remembered it was time to bake the Swedish Kladdkaka
This is the third thing I have ever baked. Potato bun, blueberry pie, and now the kladdkaka.
Why Kladdkaka
Kladdkaka means sticky cake in Swedish. The whole point is the gooey, fudgy middle. No baking powder, no rising agent, nothing to make it puff up. It is supposed to be set at the edges and barely cooked in the centre. Underbake it and it is right. Overbake it and you have made a chocolate sponge, which is not the same thing.
It is one of the most baked cakes in Sweden. Every household has a version. The recipe is short. Butter, sugar, eggs, flour, cocoa, vanilla, salt. The technique is unforgiving in one direction only. Bake time is everything.
How It Comes Together
flowchart TD
    A[Melt butter] --> B[Cool 5 min]
    C[Whisk eggs and sugar until pale] --> D[Add vanilla]
    D --> E[Stream in cooled butter while whisking]
    B --> E
    F[Sift flour, cocoa, salt] --> G[Fold into wet mix]
    E --> G
    G --> H[Pour into 24cm tin]
    H --> I{Bake 18 to 22 min}
    I -->|Edges set, centre wobbly| J[Pull out]
    I -->|Skewer comes out clean| K[Overbaked, sponge territory]
    J --> L[Rest 30 min]
    L --> M[Dust icing sugar]
    M --> N[Serve with cream and strawberries]
Why It Works
| Element | Role |
|---|---|
| No leavening | Keeps the cake dense and fudgy, not cakey |
| High butter to flour ratio | Rich, almost brownie-like texture |
| Short bake time | Centre stays gooey, edges set |
| Cocoa powder, not melted chocolate | Cleaner chocolate flavour, more traditional |
| Rest before serving | Lets the centre firm up just enough to slice |
Ingredients (8 slices)
| Ingredient | Brand / Source | Amount |
|---|---|---|
| Unsalted butter | Yeo Valley | 200g |
| Caster sugar | Tate & Lyle Pure Cane | 300g |
| Large eggs | Haywood Farm, Somerset (Notting Hill Farmers Market) | 2 |
| Plain flour | Waitrose Organic | 150g |
| Cocoa powder | Menier 100% (Dutch processed) | 25g (~4 tbsp) |
| Vanilla extract | Nielsen-Massey | 2 tsp |
| Salt | Any | 1 pinch |
| Icing sugar, for dusting | Tate & Lyle | 1 tbsp |
For serving
| Ingredient | Brand / Source | Amount |
|---|---|---|
| Double cream | Duchy Organic | 300ml |
| Caster sugar (for cream) | Tate & Lyle | 1 tbsp |
| Strawberries | Waitrose Organic | 300g |
Two things that matter for the ingredients
Use plain flour, not self-raising. Self-raising has baking powder in it and will make the cake rise and set in the middle, which is the opposite of kladdkaka. For the cocoa, Dutch processed (alkalised) is what Swedish recipes use. Menier has potassium carbonate listed in the ingredients, which is the alkalising agent. Gives a darker, mellower, more authentic flavour than natural cocoa.
Method
Step 1, Preheat and prep
Preheat the oven to 175°C fan or 195°C conventional. Grease a 24cm round metal springform tin with butter and dust the inside with cocoa powder. Tap out the excess. The cocoa stops the cake sticking and looks better than flour against a dark cake.
Step 2, Melt the butter (bain-marie method)
The traditional method here is a bain-marie, which is what most of the Swedish baking videos show. Quarter fill a saucepan with water, about 3 to 4cm deep, and bring to a low simmer. Place a heatproof glass or metal bowl on top of the pan, big enough to sit on the rim without touching the water. Put the 200g butter in the bowl and let the steam melt it gently, stirring occasionally.
The advantage is control. The bowl never gets hotter than the steam, around 100°C, so the butter melts cleanly without browning or scorching. Takes 5 to 8 minutes. Lift the bowl off carefully (the bottom will be hot from steam) and set aside to cool for 5 minutes.
A direct saucepan over low heat works too, but you have to watch it the whole time. Bain-marie lets you ignore it while you weigh out flour and crack eggs.
Step 3, Mix the dry ingredients
Sift the flour, cocoa powder, and salt together into a separate bowl. Sifting matters here. Cocoa clumps and you do not want pockets of dry powder in a gooey cake. Set this bowl aside.
Step 4, Whisk eggs and sugar
In a large mixing bowl (your biggest one), whisk the 2 eggs and 300g caster sugar together until pale and slightly thickened. About 30 to 45 seconds on medium speed with an electric whisk (I am using a ProCook). The sugar should start to dissolve into the eggs and the mixture should look paler and a bit foamy.
Why this step matters
Whisking eggs and sugar together creates the only structure the cake has. There is no leavening, so this aeration plus the egg proteins is what holds it up. Do not skip it, but do not overdo it either. You are not making a sponge, so stop when it is pale and foamy, not when it is fully whipped to ribbons.
Step 5, Add the vanilla and butter
Add 2 tsp vanilla extract to the egg and sugar mixture. Drop the electric whisk to low speed, then pour the cooled melted butter in a slow stream while whisking. Bump back up to medium for 10 to 15 seconds until fully combined and glossy. Do not blast it on high or you will deflate the eggs you just whisked up.
Step 6, Fold in the dry ingredients
Switch to a spatula. Tip the sifted flour and cocoa from the dry bowl into the wet mixture and fold gently until no dry streaks remain. Do not overmix and do not use the electric whisk here. The batter will be thick and glossy.
Step 7, Pour into the tin
Pour the batter into the prepared tin and smooth the top with the back of a spoon. The batter should sit about 2cm deep.
Step 8, Bake
Bake for 18 to 22 minutes. This is the critical part. The edges should look set and slightly cracked. The middle should still look soft and slightly wobbly when you tap the side of the tin. A skewer or knife inserted into the centre should come out with wet, fudgy batter on it. Not raw runny mix, but not clean either.
Underbake on purpose
If you wait until the skewer comes out clean, you have gone too far. Pull it when the centre still looks underdone. The cake firms up considerably as it cools.
Step 9, Rest
Rest the cake in the tin for at least 30 minutes before slicing, an hour is better. Leave it uncovered on a wire rack with airflow underneath. Do not cover with foil while resting, you will trap steam and the top will go wet and sticky. The gooey middle needs time to settle. Cut too early and the centre runs out and the cake collapses.
Step 10, Dust and serve
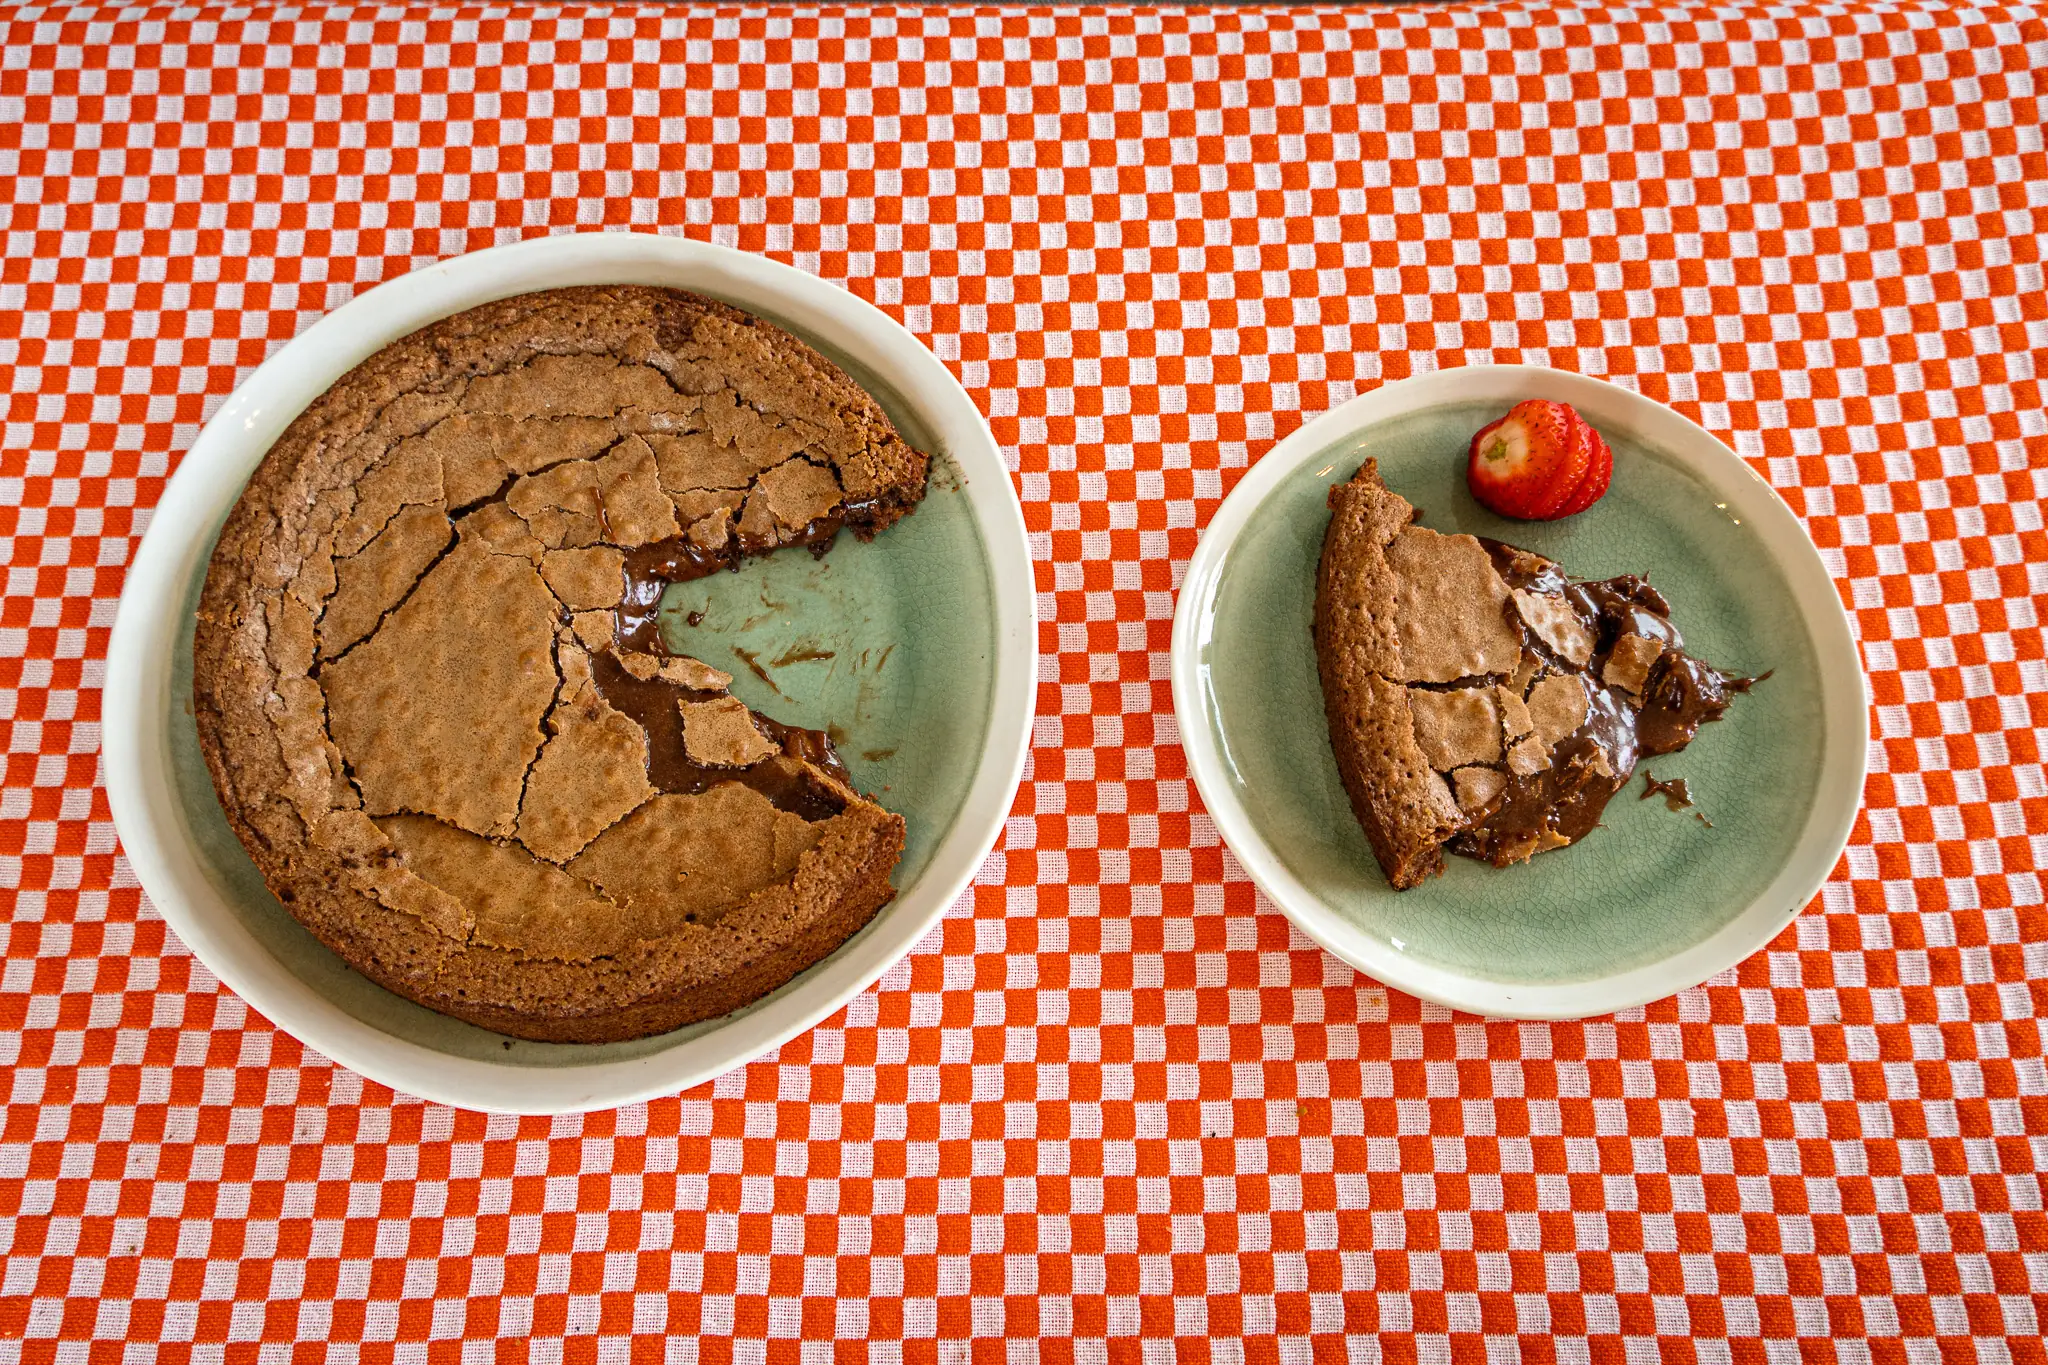
Just before serving, dust the top with icing sugar through a sieve. Whip the double cream with 1 tbsp of caster sugar to soft peaks. Serve a slice with cream and a small handful of strawberries on the side.
How to Tell If It Came Out Right
The whole game with kladdkaka is the knife test at the 18 minute mark. Insert a knife or skewer into the centre of the cake. What it comes out coated with tells you what to do.
| Knife comes out with | What to do |
|---|---|
| Wet, sticky, fudgy batter coating it | Pull the tin out, this is done |
| Runny liquid batter dripping off | Close oven, give it 2 more min, retest |
| Mostly clean with a few crumbs | Pull it now, already gone too far |
| Completely clean | Pull it now, it is a sponge |
The cake should look like it needs another five minutes when you pull it. Edges set and slightly cracked, centre with a subtle wobble when you tap the tin, top matte not glossy. The middle will fall slightly as it rests, which is correct. After 30 minutes you should have a thin set crust, set sides, and a glossy fudgy centre that holds its shape but looks underdone. That is kladdkaka.
Nutrition, Per Slice (8 slices, cake only)
| Macro | Amount |
|---|---|
| Calories | ~360 kcal |
| Protein | ~4g |
| Carbohydrates | ~45g |
| Fat | ~21g |
| Fibre | ~1.5g |
| Sugar | ~38g |
With Accompaniments
| Serving option | Additional kcal | Additional fat |
|---|---|---|
| + 50g whipped cream | ~225 kcal | ~24g |
| + 50g strawberries | ~16 kcal | ~0g |
This is a treat. High sugar, high fat, low protein. Kladdkaka is not pretending to be anything else.
Notes for First Bake
This is my third bake ever and the first one where the bake time is the whole game. The blueberry pie was forgiving. 25 minutes and a skewer test. Kladdkaka punishes you for over trusting the skewer. The whole point is that the skewer never comes out clean.
The Swedish move is to pull the cake when the edges look done and the centre still looks like it needs another five minutes. That is where it lives. If in doubt, pull it earlier rather than later. A slightly raw kladdkaka is closer to authentic than a fully baked one.
Summary
| Detail | Value |
|---|---|
| Source | Classic Swedish home recipe |
| Adapted for | UK ingredients (Waitrose + Notting Hill Farmers Market) |
| Tin size | 24cm round metal springform |
| Bake time | 18 to 22 minutes at 175°C fan |
| Yield | 8 slices |
| Calories per slice | ~360 kcal |
| Best served with | Whipped cream and fresh strawberries |
Two bowls, one saucepan, fold together, underbake on purpose. The hardest part is trusting that the wobbly centre is correct.
Documented May 2026. Stockholm trip end of May.